Why You Need To Replace Your Faucet With a Pull-Down Sprayer

Choosing the right faucet for your kitchen can make a world of difference, not just in functionality but also in style. Have you considered upgrading to a pull-down sprayer faucet? This simple change can revolutionize the way you use your kitchen space.

Whether you’re washing dishes or filling pots, a pull-down sprayer faucet offers convenience and versatility that traditional faucets just can’t match. Here’s why you need to replace your faucet with a pull-down sprayer.

Enhanced Versatility and Convenience

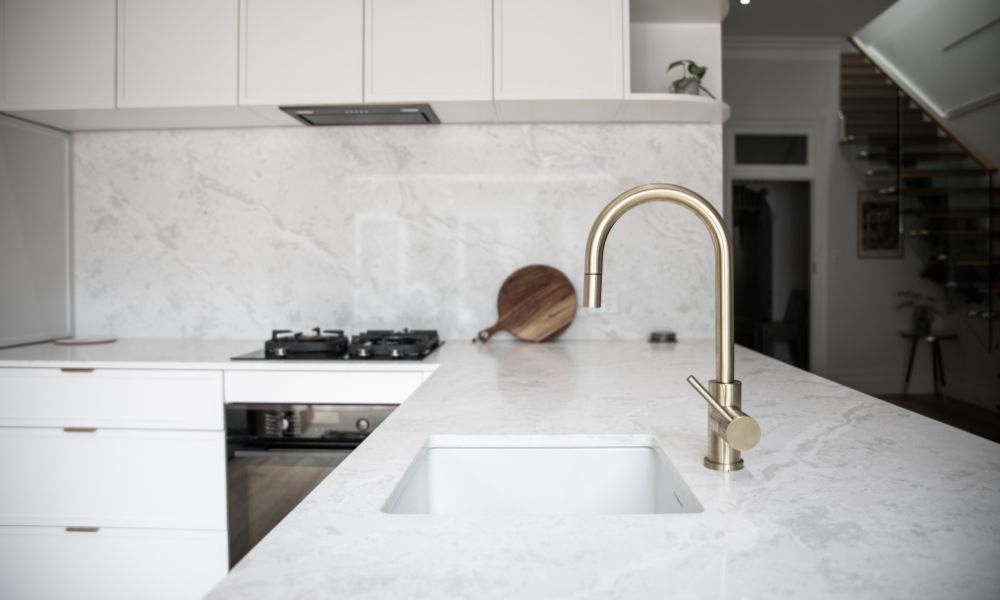
Why settle for a traditional faucet when you can have so much more? A pull-down sprayer faucet provides exceptional versatility. Imagine effortlessly rinsing vegetables, filling pots, and cleaning the sink with a single motion. The flexible hose allows for an extended reach and multiple spray modes, making everyday tasks easier and more efficient.

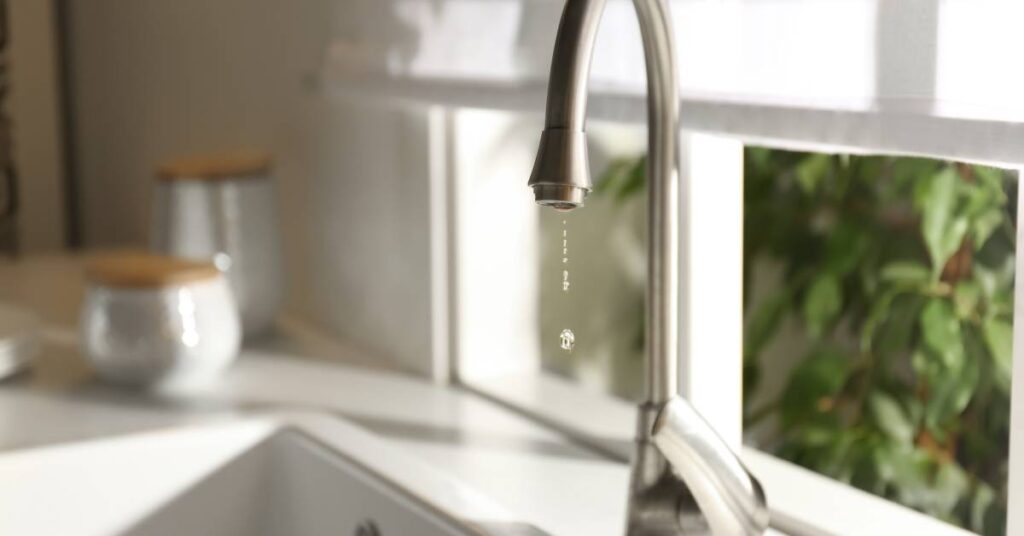
Water Efficiency and Savings

Conserving water is essential for both the environment and your utility bills. Pull-down sprayer faucets are designed to minimize water wastage. With precise control over water flow and efficient spray modes, you can accomplish tasks without running the tap continuously. This not only saves water but also reduces your monthly expenses.

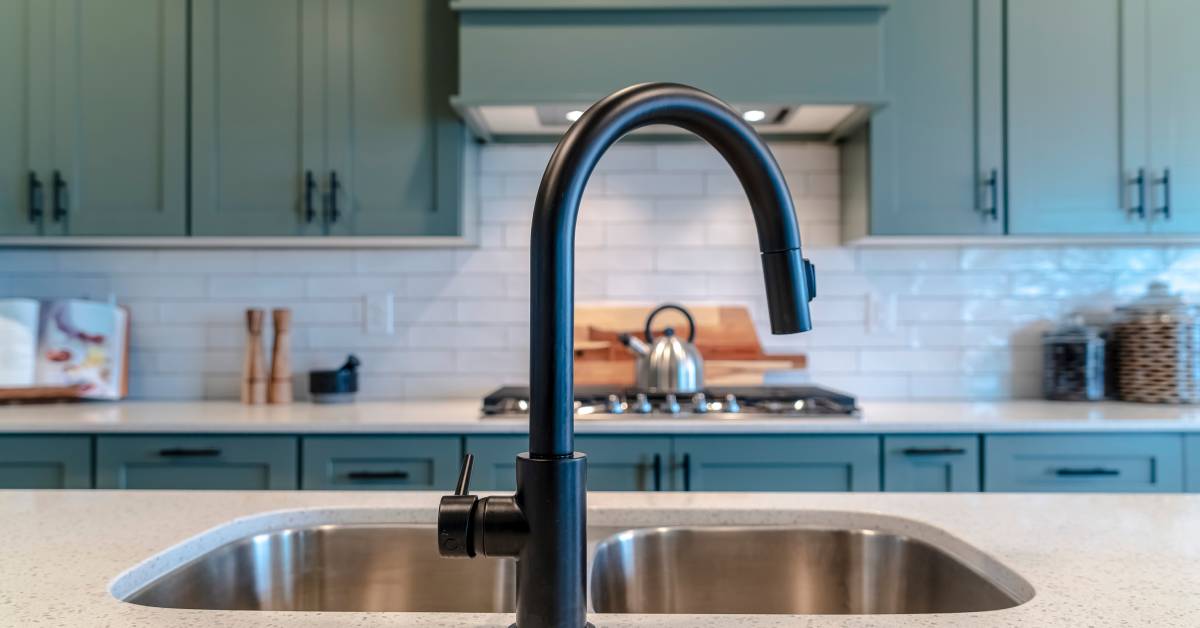
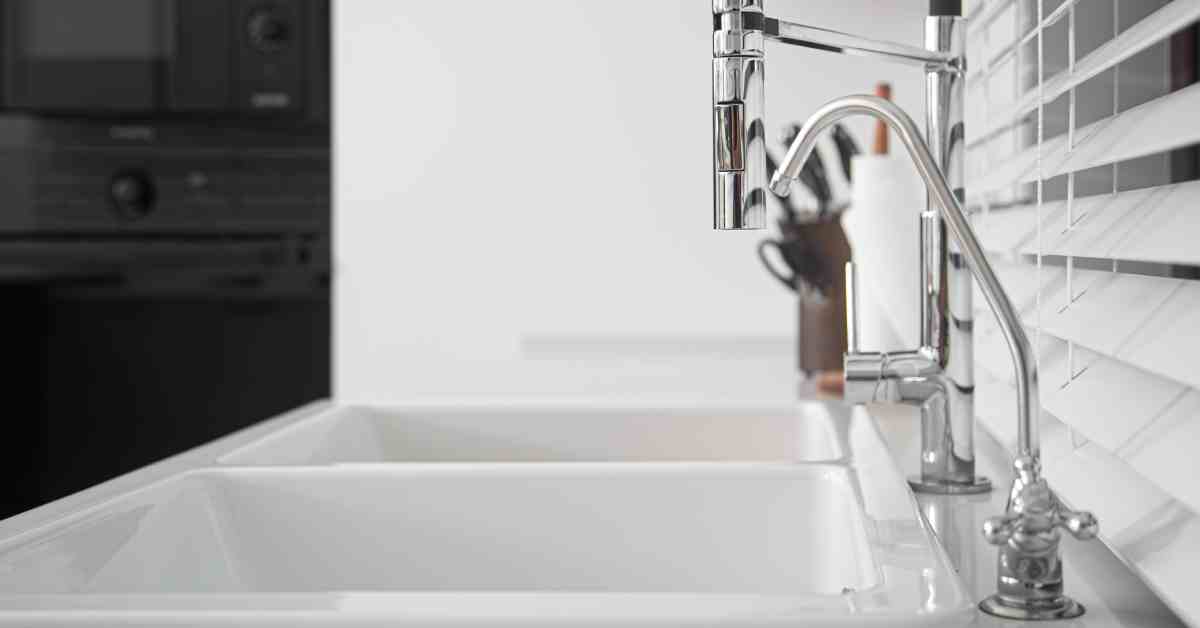
Aesthetics and Modernization of Your Kitchen

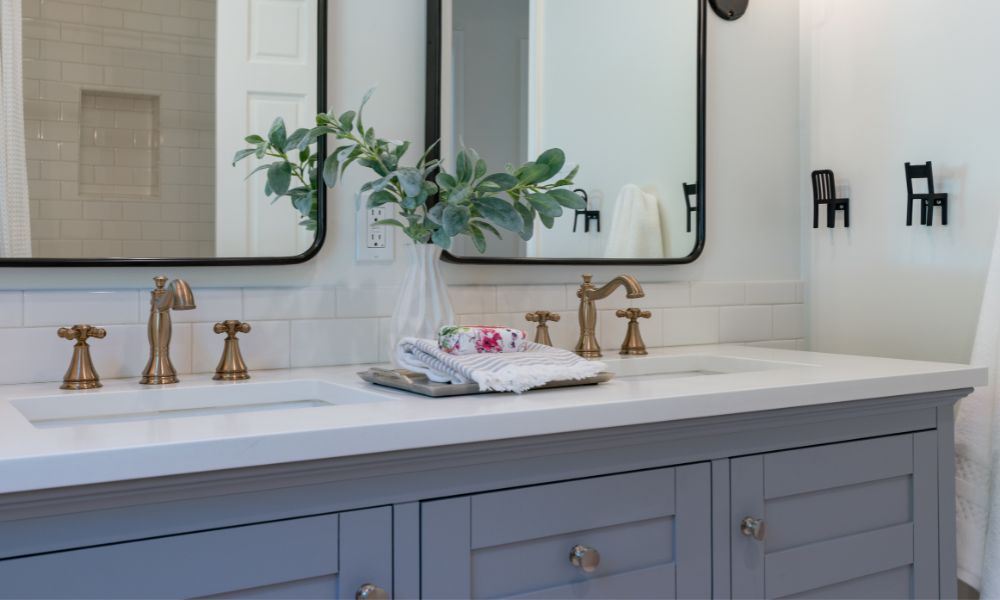
A sleek, modern faucet can elevate the entire look of your kitchen. Pull-down sprayer faucets come in various designs and finishes, allowing you to choose one that complements your decor. Whether you prefer a brushed nickel finish or classic chrome, there’s a style to suit every taste. Modernizing your kitchen has never been easier.

Quality Materials and Durability

When investing in a new faucet, quality matters. Look for models made from durable materials like stainless steel or brass. These materials resist corrosion and ensure longevity. A high-quality pull-down sprayer faucet will withstand daily use and maintain its appearance for years, cementing it as a wise investment.
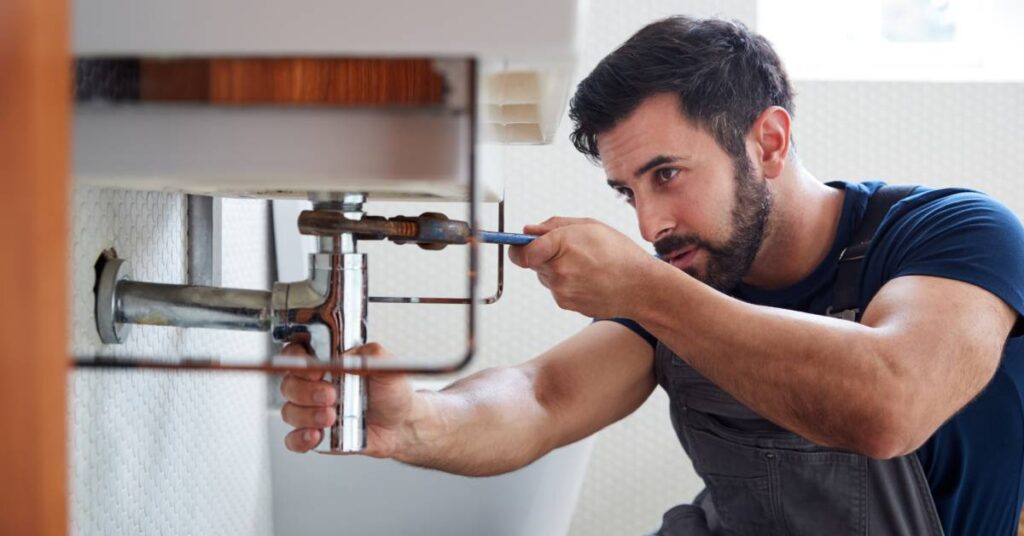
Easy Installation

Worried about the hassle of installation? Many pull-down sprayer faucets are designed for easy installation. Some models come with pre-attached hoses and straightforward instructions, allowing even a novice to set them up. Simplifying the installation process means enjoying your new faucet sooner without unnecessary stress.

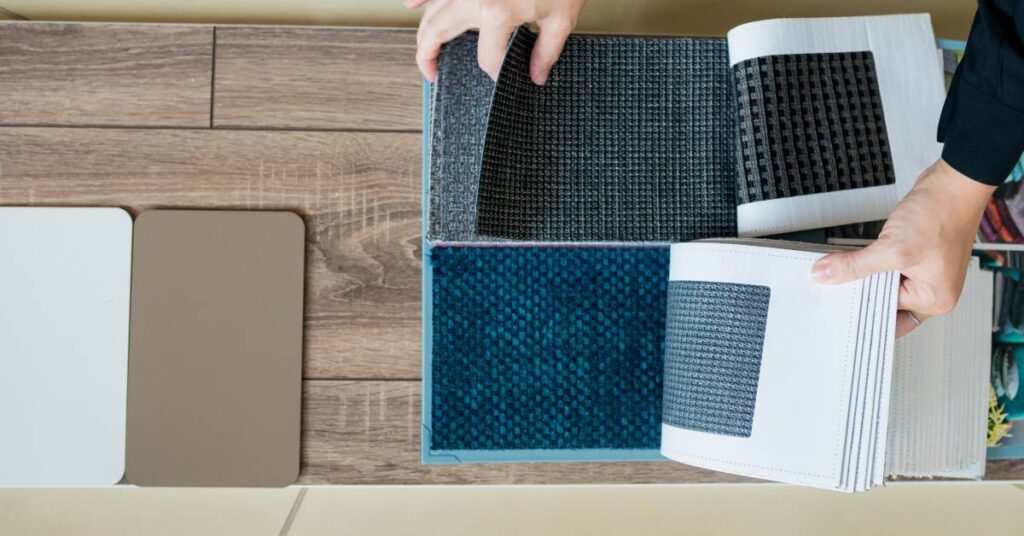
Considering Your Kitchen Layout and Needs

Before selecting a pull-down sprayer faucet, assess your kitchen layout and needs. Consider the size of your sink, the height of your cabinets, and your typical kitchen tasks. A faucet that suits a small apartment kitchen may be better for a large family home. Tailoring your choice to your specific requirements ensures optimal use and satisfaction.

Budget-Friendly Options vs. Premium Features

Everyone loves a good deal, but sometimes it’s worth splurging on premium features. Budget-friendly pull-down sprayer faucets offer excellent functionality, but higher-end models may include advanced features like touchless operation or magnetic docking.

Exploring options like the California faucet shower systems can provide a luxurious experience. Weighing your options and budget will help you find a faucet that meets your needs without breaking the bank.

Making the Right Choice for Your Kitchen

Upgrade your kitchen with a pull-down sprayer faucet for better cleaning and cooking. Its sleek design instantly elevates your kitchen’s look. It’s a smart choice for any homeowner, offering convenience and functionality to make daily kitchen activities smoother and more enjoyable. Invest in a pull-down sprayer faucet to experience the perfect blend of form and function. Explore our range at George’s Showroom and transform your kitchen today!

Everything You Need To Know About Maintaining Your Faucet

A double-bowl stainless-steel kitchen island sink with a black faucet, quartz countertops, and green cabinets.

Are you tired of dealing with leaky faucets or low water pressure? Maintaining your faucet might seem daunting, but it’s essential for ensuring that your plumbing runs smoothly and efficiently.

To help keep your faucet in stellar shape, we’re here to walk you through everything you need to know about maintaining your faucet, from basic cleaning to more advanced troubleshooting. By the end of this post, you’ll have all the knowledge you need to keep your faucet working perfectly for years to come.

The Importance of Faucet Maintenance

Faucets are among the most frequently used fixtures in any home. Over time, they can wear out, leading to leaks, decreased water pressure, and other issues. Regular maintenance helps prevent these problems, saving you money on water bills and potential repairs.

By neglecting maintenance, you put your water pressure at risk. This can manifest from mineral buildup or other obstructions. Regularly cleaning your faucet’s aerator and other parts ensures optimal water flow and performance, keeping everything efficient and preventing costly problems.

Extending Faucet Lifespan

A well-maintained faucet can last for many years. By taking the time to care for your faucet, you’re investing in the longevity and efficiency of your home’s plumbing system. This can also save you time and money in the long run by avoiding expensive repairs or replacements.

Basic Faucet Cleaning

Maintaining your faucet doesn’t have to be a complicated process. Simple regular cleaning and minor adjustments can make a world of difference. Here are a few basic ways to keep your faucet squeaky clean:

Daily Wipe-Down

You can wipe down your faucet with a soft cloth daily. This helps remove water spots, soap residue, and fingerprints that can build up over time. A quick wipe-down can keep your faucet looking shiny and new.

Weekly Deep Clean

Once a week, give your faucet a deeper clean. Use a mild soap and water mixture to remove any grime or buildup. Be sure to pay extra attention to the nooks and crannies where dirt can accumulate.

Mineral Buildup Removal

Mineral buildup from hard water can affect your faucet’s performance. To remove it, soak a cloth in vinegar and wrap it around the affected area for a few hours. The vinegar will help dissolve the minerals, making them easier to scrub away.

A close-up of a male plumber using a hand tool to fix a leaking or faulty sink in a residential bathroom.

Remember To Check for Leaks

Regularly inspecting your faucet for leaks is crucial. You can start by looking over the base where it connects to the sink. A leak is likely present if you notice any pooling water or dampness. Next, turn on the faucet and observe the handles for drips. If water is escaping, you may need to replace the O-rings or tighten the connections.

Additionally, monitor your water bill for any sudden increases, as this could indicate a hidden leak in your faucet or plumbing. Addressing leaks promptly can save you money and prevent further damage.

Maintain Your Faucet Components

Your faucet consists of several components that require regular maintenance. Here’s what you need to know:

Cleaning the Aerator

The aerator is the small screen at the end of your faucet’s spout. It can become clogged with mineral deposits and debris, affecting water flow. To troubleshoot this, remove the aerator and soak it in vinegar to dissolve any grime. Once soaked off, rinse it thoroughly before reattaching it.

Replacing Washers and O-Rings

Washers and O-rings are small rubber components that can wear out over time. If your faucet is leaking, these parts may need replacements. Consult your faucet’s manual to find the correct sizes and types of washers and O-rings for your model.

Lubricating Moving Parts

Apply a small amount of plumber’s grease to keep your faucet’s handles and other moving parts operating smoothly. This will help reduce friction and prevent wear and tear.

Advanced Troubleshooting for Bigger Issues

If your faucet is still causing issues after basic care, it’s time to bring out the big tools. Advanced troubleshooting may be required if you’re experiencing more severe problems with your faucet. Here’s what to look for:

Addressing Low Water Pressure

Various factors, including clogged pipes or a malfunctioning pressure regulator, can cause low water pressure. If cleaning the aerator doesn’t resolve the issue, you may need to consult a professional plumber.

Fixing Dripping Faucets

A worn-out cartridge or valve seat often causes a dripping faucet. Replacing these components can be a bit more complex, but it’s a task that many homeowners can handle with the right tools and instructions.

Dealing With Noisy Faucets

If your faucet is making strange noises, it could be due to pipe air or a loose component. To resolve the issue, tighten any loose parts and bleed the air from your plumbing system.

A close-up of a dripping kitchen faucet with water drops actively falling. The window next to it is open.

Choosing the Right Faucet

When it’s time to replace your faucet, choosing the right one can significantly impact your home’s plumbing. Faucets come in various styles and finishes, from sleek modern designs to classic options. Select a faucet that matches your home’s look and meets your needs. A high-quality faucet with durable materials, such as brass or stainless steel, will resist corrosion and wear. It’ll last for years.

Check for Features

Modern faucets have various features, such as pull-out sprayers, touchless operation, and water-saving technology. Consider which features are most important to you, and look for a faucet that offers them.

The Key to Long-Term Maintenance

Consistency is the cornerstone of long-term faucet maintenance. Establishing and sticking to a routine ensures your faucet remains in optimal working condition. Regular upkeep prevents minor issues from escalating into significant problems, saving you time and money. Here are some key points to remember for effective long-term maintenance:

• Schedule regular cleanings and inspections.
• Keep an eye out for any changes in water flow or pressure.
• Address minor issues promptly to prevent them from becoming more extensive and costly repairs.
• Don’t hesitate to consult a professional if you’re unsure about maintenance tasks.

Keep Your Faucet in Tip-Top Shape

Maintaining your faucet is essential for optimal performance and longevity. By understanding everything you need to know about maintaining your faucet, you can keep it in top shape and avoid leaks and low water pressure.

Whether you handle maintenance or hire a professional, regular care will maximize your home’s plumbing system. For expert advice and quality products, visit George’s Showroom and explore our California Faucets collection. Here’s to a drip-free, efficient, and long-lasting faucet!

5 Quick Home Improvements That Will Jazz Up Your Home

An Interior designer is choosing paints and textile materials for a home renovation. They're laying out samples on a board.

Do you want to give your home a fresh look without breaking the bank or spending countless hours renovating? Small home improvements can make a big difference in the ambiance and functionality of your living space, making it a more enjoyable place to live. Explore five quick home improvements that will jazz up your home!

Revitalize the Walls With Fresh Paint

A fresh coat of paint is one of the best ways to revitalize a room. Whether you choose a bold accent wall or a neutral tone, paint can transform a space. Pick a palette that complements your furniture and décor. After painting, remember those finishing touches! Finding new wall art or rearranging existing pieces can enhance the look. You’ll be amazed at how a simple paint job can transform your home!

Upgrade the Light Fixtures

Upgrading to modern lighting can enhance your home’s ambiance. Replace old fixtures with contemporary designs for a brighter, more elegant look. LEDs are energy-efficient and long-lasting, and dimmable options offer adjustable brightness for various activities and times of day.

Let in the sunshine! Install sheer curtains or blinds to let in sunlight, creating a warm and inviting atmosphere. Lighting can make your home feel more spacious and welcoming.

Install High-Quality Door Hardware

Upgrading door hardware is a simple way to add style and functionality to your home. High-quality options, like Emtek door hardware, offer designs that look great with any door. When choosing door hardware, consider your home’s design and color scheme.

Go for finishes that match your décor, such as polished chrome, oil-rubbed bronze, or satin nickel. Besides looking good, high-quality door hardware boosts a door’s security and durability. You’ll feel the difference every time you open and close a door!

Refresh the Flooring

Your floors endure daily wear, so refreshing them can enhance your home’s vibe. Whether you choose a new carpet, hardwood, or tile, plenty of options will fit your style and budget. For a quick, budget-friendly update, add area rugs to bring color and texture to your rooms. Rugs can define spaces, especially in open-concept homes, and add a cozy feel underfoot.

Enhance Your Home’s Curb Appeal

Enhancing your home’s curb appeal is a quick home improvement that can help jazz up the exterior. Start by painting the front door a bold color and upgrading its hardware. Maintain landscaping by trimming bushes, adding mulch, and planting flowers.

Other easy improvements include updating your address numbers, installing outdoor lighting, and adding a welcoming doormat. Small changes can significantly improve your home’s exterior.

Spruce up Your Home With Ease

Small home improvements can profoundly impact your living space, making it more enjoyable and functional. Implementing these five simple upgrades will create a more inviting and stylish home. Ready to get started? Consider booking a consultation with a professional to help you choose the best options for your unique needs. Your dream home is just a few improvements away!

How To Organize a Small Bathroom in 10 Easy Steps

How To Organize a Small Bathroom in 10 Easy Steps

A small bathroom often feels cramped and chaotic, and finding space for all your essentials is challenging. However, strategic organization techniques can transform even the tiniest bathroom into a functional and stylish haven.

We’ll cover everything you need to know, from clever storage solutions to smart design tips. Whether utilizing vertical space with shelves, incorporating multipurpose furniture, or choosing the right color palette to create the illusion of a larger space, we can help you make the most of every square inch.

By the end, you’ll have an efficient bathroom that’s a pleasure to use daily. Here are ten easy steps to maximize a small bathroom space and create an organized, serene environment.

Step 1: Declutter

The first step to organizing any space is to declutter. Start by figuring out what you need and what you can get rid of. Ask yourself, “Do I use this item? Is it expired or damaged?” Be honest, and avoid keeping things for sentimental reasons or “just in case.” Eliminating unnecessary stuff will free up valuable space and create a solid foundation for more organization.

Try sorting items into “keep,” “donate,” and “trash” piles. This will make decluttering more structured and manageable. Also, consider how often you use certain items. Things you use less often can go in less accessible places, making frequently used items more straightforward to reach.

Step 2: Assess Storage Needs

Evaluate your storage needs. Consider the items you use daily versus those you use occasionally. This will help you determine the best storage solutions for your bathroom. Think about the types of products, tools, and linens you have and how often you need to access them.

Step 3: Utilize Wall Space

One of the most effective strategies for organizing a small bathroom is utilizing wall space. Install shelves, hooks, or racks to keep items off the floor and within easy reach. Floating shelves are handy for storing toiletries and decorative items, while wall-mounted baskets can hold towels and other accessories. For additional space, you can add multifunctional furniture, such as a vanity with built-in storage or a mirror cabinet.

Step 4: Organize Drawers and Cabinets

Drawers and cabinets are prime real estate in any bathroom, so using them efficiently is essential. Invest in drawer dividers and organizers to hold small items like makeup, hair accessories, and grooming tools. For cabinets, consider adding stackable bins or pull-out trays to maximize vertical space and make items more accessible.

Examples:

  • Drawer dividers
  • Organizers for small items
  • Stackable bins
  • Pull-out trays

Step 5: Use Under-Sink Organization

The area under the sink often goes overlooked but can provide valuable storage space. Use stackable bins, pull-out drawers, or tiered shelves to organize cleaning supplies, extra toiletries, and other essentials. Consider installing a Vola bathroom faucet, which adds a touch of elegance and frees up additional space under the sink with its sleek design.

Step 6: Organize the Linen Closet

If you have a linen closet in your bathroom, keeping it organized is crucial. Use labeled baskets or bins to separate towels, washcloths, and other linens. Roll towels instead of folding them to save space and create a spa-like aesthetic. A shelf divider can also help keep items stacked neatly.

Step 7: Use Shower Storage

Organizing your shower is paramount in maintaining a clutter-free bathroom. Given the limited space, smart storage solutions must keep your shower essentials within easy reach while maintaining a tidy appearance. Here are some effective strategies to achieve optimal shower organization:

  • Install corner shelves or a shower caddy to store shampoos, conditioners, and body washes.
  • Use suction cup hooks to hang loofahs and washcloths.
  • Add a hanging shower organizer to hold razors and other small items.
  • Add a tension rod for hanging baskets or additional hooks.
  • Use magnetic strips to secure metal grooming tools.
  • Get a waterproof clock to keep track of time.
  • Install a shower mirror for shaving or facial-care routines.

Step 8: Use Over-the-Door Storage

Don’t overlook the back of the bathroom door as a storage opportunity. Over-the-door organizers can hold everything from toiletries to cleaning supplies. Look for options with clear pockets to see and access your items easily. This is an excellent way to keep frequently used products within reach without wasting valuable floor space.

Step 9: Maximize Light and Use Mirrors

A well-lit bathroom feels more spacious and inviting. Maximize natural light by keeping windows clear of obstructions and using sheer curtains. If natural light is limited, install bright, energy-efficient lighting. Mirrors can also create the illusion of space. Consider a large mirror above the sink or multiple smaller mirrors to reflect light and open up the room visually.

Step 10: Do Maintenance and Ongoing Organization

Once you’ve organized your bathroom, regular upkeep is the key to keeping it that way. Establish a routine where you tidy up daily by wiping surfaces, putting away toiletries, and ensuring everything is in place. Every month, dedicate some time to deeper cleaning, including scrubbing tiles, cleaning grout, and removing expired products. Put things away right after you use them to avoid clutter and keep the space functional and serene. This consistent attention will ensure your bathroom remains a relaxing and orderly sanctuary.

Keeping your bathroom organized doesn’t have to be a chore. Here are some simple tips to keep your space tidy and functional:

  1. Create a daily routine: Wipe surfaces, put away toiletries, and hang towels daily. This will help prevent clutter and maintain organization.
  2. Use labels: Label baskets, bins, and shelves so that everyone knows where things belong. This makes it easier to keep everything in its place.
  3. Assign spots for frequently used items: Ensure frequently used items like toothbrushes and hand towels are easy to access. Designate specific spots for these items to streamline your routine.
  4. Stay flexible: Be open to adjusting your organizational system. As your lifestyle changes, so may your storage needs. Flexibility is critical to maintaining an organized bathroom long term.

Create a Spa-Like Experience Today

With our ten-step guide to organizing a small bathroom, you can transform your space into an efficient, functional, and beautiful sanctuary. By implementing these strategies, you’ll enhance your bathroom’s efficiency and elevate your daily routine. Ready to embark on your bathroom organization journey? Visit George’s Kitchen and Bath to explore our range of quality products and innovative solutions tailored to your needs.

How To Organize a Small Bathroom in 10 Easy Steps

Practical Organization Tips for Your Bathroom Cabinets

A well-organized and modern residential blue bathroom with a double vanity cabinet and blue and white tiled floors.

A well-organized bathroom can transform your daily routine, making your mornings stress free and your evenings more relaxing. Imagine starting your day with everything you need at your fingertips, from neatly arranged toiletries to easily accessible towels. If your bathroom cabinets are cluttered and chaotic, it’s time to take control. This simple change can bring a sense of order and calm to your space, enhancing your overall well-being.

Here are a few practical organization tips for your bathroom cabinets to help maximize space and efficiency.

Assessing Your Needs

Before you begin organizing your bathroom cabinets, you must understand what you need to store there. Are you dealing with an overabundance of toiletries, towels, or cleaning supplies? Evaluate your storage space and determine which items are essential for your bathroom. Ask yourself: “What do I use daily, and what can I store elsewhere?” From there, you can assess your needs and dictate your storage flow.

Decluttering Strategies

Decluttering is the cornerstone of any successful organizational project. Start by emptying your cabinets and sorting through every item. Create three piles for keeping, discarding, and relocating. Be ruthless with the discard pile—expired products and items you haven’t used in months have no place in your newly organized space.

Also, group similar items together to make organizing easier. This way, you can quickly locate your hair-care products, skin-care essentials, and first-aid supplies when needed.

Storage Solutions

Now that you’ve decluttered, it’s time to think about how to store your remaining items effectively. Invest in creative storage solutions that make the most of your space:

Drawer dividers: These are perfect for keeping small items like makeup and grooming tools separate and easily accessible.
Baskets and bins: Use these to organize more oversized items, such as bath towels or cleaning supplies.
Over-the-door organizers: Maximize vertical space by hanging these inside cabinet doors for extra storage.

Consider upgrading to James Martin vanities, known for their stylish design and functional storage options. These vanities offer ample space for all your bathroom necessities, making it easier to maintain an organized environment.

Maintenance and Upkeep

The key to long-term organization is regular maintenance. Set aside time each month to review the contents of your bathroom cabinets. Remove items that are no longer necessary, and ensure you return everything to its designated place. Consistent upkeep will prevent clutter from creeping back in and keep your space tidy and efficient.

Implementing these practical bathroom cabinet organization tips will help you achieve a streamlined, stress-free space that adds tranquility to your daily routine. Enjoy the convenience of being able to find your items quickly and efficiently. Browse our luxurious vanities and bathroom fixtures to help spruce up your space.

When To Use Knobs vs. Pulls on Your Cabinet

A wide variety of decorative and stainless steel cabinetry door knobs and pull handles are on display.

Have you ever noticed how small details can dramatically change the look and feel of a room? Cabinet hardware, such as knobs and pulls, are perfect examples of these subtle touches that make a significant impact.

Whether you’re a homeowner embarking on a renovation or an interior designer crafting a masterpiece, understanding when to use knobs versus pulls on your cabinet can elevate your design to the next level. Keep reading to enhance your interior design.

The Difference Between Knobs and Pulls

What sets knobs and pulls apart? Knobs are typically small, round pieces of hardware affixed to the cabinet with a single screw. They are simple, classic, and versatile. Pulls, on the other hand, are elongated and require two screws for attachment, offering a more substantial grip.

Functionally, knobs are generally used for cabinets, while pulls are more commonly reserved for drawers. Their practical uses vary depending on the ease of access and the force needed to open the cabinet or drawer.

Aesthetics and Design

The choice between knobs and pulls significantly affects the overall aesthetics of your space. Knobs often lend a timeless, charming look to cabinets, making them perfect for traditional or cottage-style kitchens. With their sleek lines, pulls are ideal for modern, contemporary designs.

Matching your hardware to the style of your cabinets and home is crucial. For example, if your home features rustic wooden cabinets, vintage-style knobs might be the way to go. On the other hand, streamlined pulls can create a cohesive and sophisticated appearance if you have sleek, high-gloss cabinets.

Ergonomics and Daily Use

Beyond aesthetics, consider the ergonomics and daily usability of knobs and pulls. Pulls offer a more comfortable grip, making them easier to use, especially for larger drawers or cabinets that store heavy items. Knobs, while charming, might not provide the same level of comfort for frequent use.

Best practices for placement include installing knobs on cabinet doors and pulls on drawers to ensure ease of use. The hardware size should also correspond to the size of the cabinet or drawer to maintain balance and functionality.

When To Use Knobs vs. Pulls

When choosing between knobs and pulls, think about the overall design and functionality of your space. There’s no hard and fast rule for using one over the other; the choice comes down to personal preference and the look you want. Here are a few things to consider:

  • Cabinet type and size: Smaller cabinets might look disproportionate with large pulls, making knobs a better choice.
  • Room style and function: A modern kitchen might benefit more from sleek pulls, while a traditional bathroom could be improved by classic knobs.
  • Personal preferences and design trends: Your taste and current trends can also guide your decision. For instance, mixing knobs and pulls is a growing trend that adds visual interest and functionality.

Adorn Your Cabinets With the Finest

Choosing between knobs and pulls may seem like a minor detail, but it dramatically impacts your home’s overall design and functionality. Understanding the many considerations associated with this design choice allows you to make a well-informed decision that elevates your space.

Ready to transform your cabinets? Explore our exquisite range of finishes, such as Emtek door knobs, and discover how small details can make a big difference in your home design.

4 Helpful Things You Can Do for Your Kitchen Drains

A stream of water falling and pooling into a stainless steel kitchen sink and entering a draining system.

Keeping your kitchen drains pristine is crucial for maintaining a clean and functional kitchen. Often overlooked, drain maintenance can prevent clogs, eliminate unpleasant odors, and save you from costly repairs. By following a few simple yet effective tips, you can keep your drains clear. Here are four helpful things you can do to keep your kitchen drains in top shape.

1. Establish a Regular Cleaning Routine

How often do you clean your kitchen drains? Regular maintenance is the key to preventing blockages and buildup. Aim to clean your drains at least once a week. Use hot water and vinegar to flush out residue and keep your drains smelling fresh. Make it a habit, and your drains will thank you!

2. Avoid Grease Buildup

Are you guilty of pouring cooking oils and fats down the drain? This common mistake leads to stubborn clogs over time. Instead, let the grease cool and solidify, then dispose of it in the trash. Making this small change can reduce the risk of clogs and keep your kitchen drains flowing smoothly.

3. Prevent Clogs With Everyday Items

Simple daily habits can make a big difference in preventing drain clogs. You can use a sink strainer to catch food and debris before they enter the drain. This inexpensive tool is highly effective in avoiding buildup. An ounce of prevention is worth a pound of cure!

4. Hire a Professional for Maintenance

When should you call in the experts? If you notice persistent clogs, slow drains, or unpleasant odors that regular cleaning can’t fix, it’s time to seek professional help. A licensed plumber can perform thorough inspections and offer advanced solutions to keep your kitchen drains in optimal condition.

Keep Your Drain in Good Condition

By incorporating these tips to help your kitchen drains, you can extend their life. When it’s time for a professional touch, remember that George’s Kitchen and Bath is here to assist. Our California Faucets kitchen faucet collection will add elegance to your kitchen and ensure lasting performance and reliability. Don’t wait for a problem to make itself known! Take proactive steps today, and enjoy a hassle-free kitchen tomorrow.

Cleaning Tips for Your Quartz Vanity Top

Cleaning Tips for Your Quartz Vanity Top

The bathroom is more than a space for a quick rinse; it’s a sanctuary of comfort and pampering. One of the most pivotal features, the quartz vanity top, has found its way into the hearts and homes of those who appreciate a blend of aesthetics and practicality. But with great beauty comes the need for maintenance and care.

If you’ve recently installed these dazzling countertops or are considering one for your bathroom, follow these essential cleaning tips for your Quartz vanity tops to ensure they remain a pristine centerpiece of your lavatory.

Daily Care To Preserve the Shine

Consistency is key to maintaining your quartz vanity top. Start by wiping down the surface each day with a soft cloth or sponge and a gentle, pH-balanced cleaner. Routine care is your first line of defense against the buildup of residue that can dull the surface over time.

Make sure the cleaning solution is free from harsh chemicals, like bleach or ammonia, as they can cause discoloration and damage the quartz.

Quick and Effective Daily Clean Routine

  • Mix warm water with mild dish detergent.
  • Dampen a microfiber cloth in the soapy water.
  • Wipe the entire quartz surface.
  • Rinse the cloth and go over the countertop again with just water.

Addressing Stains With Care

Despite regular cleaning, stains can spoil your vanity top. Fortunately, you can eliminate most stains on quartz if you act quickly. Use gentle cleaning tools like a non-abrasive sponge or soft brush to avoid scratching. For tough stains like waterproof makeup, hair dyes, or ink, isopropyl alcohol on a cotton swab works well—remember to rinse the area with water afterward.

Stain-Specific Strategies

For organic stains like coffee or tea, apply a paste of baking soda and water, cover it with plastic wrap, and allow it to sit overnight. Rinse the area thoroughly in the morning for a clean start. Patience and persistence pay off when dealing with stains on quartz.

Protecting and Preventing Damage

Prevention is the best form of maintenance for any vanity surface, and quartz is no exception. It’s crucial to use trivets or hot pads under hot styling tools to protect the quartz from heat damage, and never drop sharp or heavy items directly on the surface. Additionally, be cautious to avoid spilling nail polish and removers. Finally, promptly wipe up any spills, especially those with high pigmentation or acidity.

These practices extend the life of the quartz, ensuring it remains both beautiful and functional for years.

Spruce Up Your Counters

Your quartz vanity top is a practical investment in your bathroom’s look and your home’s value. By using our cleaning tips, your quartz vanity will look great year after year—adding a luxe feel to your home. To upgrade your bathroom, check out our James Martin single vanity options for timeless design and quality in your bathroom makeover. Every detail in your bathroom sanctuary matters!

How To Deep Clean Your Bathroom Showerhead

How To Deep Clean Your Bathroom Showerhead

There’s nothing like taking a shower to start your day. However, in your oasis of cleanliness, there can be a hidden source of not-so-refreshing issues—the showerhead. Over time, mineral deposits, dirt, and bacteria silently invade, affecting water quality and your daily hygiene routine. Keep reading to learn how to clean your bathroom showerhead deep.

Understanding the Need for Clean Water and Showers

A dirty showerhead can cause unpleasant bathing experiences. A clogged, grimy showerhead not only hampers water pressure but can also become a breeding ground for bacteria. Some of these bacteria may even lead to skin and hair damage. Keeping your showerhead clean allows you to have a truly refreshing bathing experience.

What a Dirty Showerhead Could Mean for You

Think beyond the rust stains and calcified nozzles. If your shower water had a foul smell, it likely means you’re dealing with bacterial growth. Additionally, the impurities from a dirty showerhead could transfer into the water and spell trouble for people with sensitive skin and respiratory systems. This can be especially troublesome for infants and the elderly. Keep your showerhead clean to protect your family members.

Step-by-Step Guide to a Sparkling Showerhead

Equipped with our guide, transforming your showerhead from a forgotten fixture to a fountain of freshness is easier than you think. With a few simple tools and inexpensive cleaning supplies, you’ll be able to elevate your shower experience. Follow these steps and prepare to bask in the glow of a perfectly polished showerhead, ensuring every shower you take is nothing short of refreshing.

Tools of the Trade

Before we begin cleaning, it’s crucial to arm ourselves with the right tools:

• Sturdy toothbrush
• Cleaning product (bleach, vinegar, or a dedicated showerhead cleaner)
• Rag
• Plastic bag
• Tape

Pre-Clean Rituals

The initial glimpse of the showerhead might seem intimidating, yet effective cleaning hinges on thorough preparation. Start by ensuring your bathroom is adequately ventilated. Confirm that your shower’s water isn’t running, and then take a moment to evaluate the shower head’s condition before commencing the cleaning process.

Before proceeding with the cleaning process, you should also know the best way to clean your showerhead, depending on its type. For instance, a fixed showerhead will require a different approach than a handheld one.

Diving into the Clean

It’s time to roll up your sleeves and get down to business. Whether you opt for the gentle touch of vinegar or the powerful cleanliness that bleach provides, it’s essential to remove the showerhead and give it a good soak.

Vinegar Approach

• Fill a sturdy plastic bag with vinegar.
• Secure it over the showerhead with tape.
• Leave it to soak for at least a couple of hours.
• Remove the bag and wipe the showerhead down with a damp rag.

Bleach Blessing

• Create a 50/50 water and bleach solution.
• Submerge the disassembled showerhead parts in the solution.
• After 30 minutes, remove and scrub with a toothbrush to dislodge grime.
• Rinse the showerhead thoroughly before reattaching it.

Maintenance Tips: Keeping Your Showerhead in Prime Shape

A pristine showerhead elevates your daily bathing ritual and protects you from unseen threats. Regular maintenance is also key to prolonging the life and performance of your showerhead. Follow these simple yet effective tips to ensure your showerhead remains in prime shape and delivers the purest and most refreshing water flow.

Regular Cleaning Schedules

Adopt a routine maintenance schedule for your showerhead. It could be as simple as giving it a quick clean every two weeks or incorporating it into your monthly deep-cleaning regime. Remember, consistency is key to maintaining a hygienic bathing space.

Preventive Procedures

Consider installing a water softener or a showerhead filter to significantly reduce mineral build-up, the main culprit behind many showerhead issues. For deeper cleaning, dismantling the showerhead to remove debris from the filter screen can also help. Adopting these preventative measures will ensure your showerhead remains in good working condition, enhancing your shower experience.

The Science Behind a Spick-and-Span Showerhead

A perfectly clean showerhead is simpler than one might think. With the right knowledge and cleaning approach, transforming your bathroom from a place of routine to a sanctuary of purity and wellness is guaranteed.

Hard Water and Mineral Deposits

The primary reason for many showerhead issues is hard water, which is rich in minerals like calcium and magnesium. When these minerals accumulate in your showerhead, the result is a limescale crust that can block the flow of water.

Acidic Solutions and Alkaline Deposits

The recommended vinegar and bleach solutions are chemistry in action. Vinegar’s acidity dissolves alkaline deposits, while bleach neutralizes organic compounds, which can combat bacterial growth.

Immediate and Long-Term Benefits of a Clean Showerhead

The benefits of a clean showerhead extend far beyond the immediate pleasure of a more powerful water flow or the aesthetic appeal of gleaming fixtures. Ensuring the cleanliness of your showerhead is instrumental in preserving your health and preventing the proliferation of bacteria and harmful chemicals that could compromise your well-being.

Extended Life for Your Showerhead

Regular and consistent cleaning is crucial to keeping your shower in good condition. It not only helps prevent clogs that can disrupt your daily routine but also plays a significant role in preserving the integrity of your shower fixtures.

By dedicating time to this aspect of bathroom maintenance, you’re essentially investing in the longevity of your bathroom’s functionality. Plus, a well-maintained shower enhances your overall bathroom aesthetics and ensures a more pleasant and hygienic environment.

Pure Water, Safer You

Safeguard your health by deep cleaning your bathroom showerhead. By removing bacteria and impurities from your showerhead, you’re protecting yourself and your loved ones from potential health hazards. A simple cleaning ritual could go a long way in safeguarding your family’s wellness.

The Power of Pristine Showerheads

The significance of a clean showerhead cannot be overstated—it’s the key to ensuring our daily showers are not only a source of cleanliness but also of comfort and safety. The secret to a sparkling showerhead starts with you, but it doesn’t end there. Incorporate these cleaning practices into your routine to elevate your shower experience and step towards a healthier, happier you. Why wait? Take up the challenge today and make your showerhead shine. Visit George’s Showroom for all your shower fixture needs. We offer luxurious brands such as, California faucets shower systems and more. Experience a spa-like bathroom today.

How To Deep Clean Your Bathroom Showerhead

The Pros and Cons of Touchless Kitchen Faucets

The Pros and Cons of Touchless Kitchen Faucets

Touchless kitchen faucets have revolutionized kitchen hardware in terms of design and functionality. With their promise of convenience, efficiency, and a modern touch, they are becoming a staple in many contemporary homes.

But what’s the catch? Before installing these convenient fixtures, homeowners and interior designers must understand the pros and cons of touchless kitchen faucets, which will help them decide if they are right for their kitchens.

The Pros of Touchless Kitchen Faucets

Meal prepping and post-dinner cleanup can be overwhelming. However, the convenience of a hands-free faucet is unbeatable. With a quick wave of the hand, the water starts running. There is no fumbling for handles, no cross-contamination, just a streamlined and hygienic experience. Let’s take a deeper look at the pros of touchless kitchen faucets.

Hygiene at the Helm

Kitchens are the heart of the home but also breeding grounds for germs. Surfaces, including the humble kitchen faucet, which is frequently touched by hands handling food, become prime for germ spread. Touchless faucets present a solution by removing the need to touch the faucet to turn it on or off, significantly cutting down on bacteria spread and enhancing kitchen hygiene.

Streamlined Water Usage

With sensors that can detect even the faintest of gestures, touchless faucets can significantly cut down on water wastage. Think of the moments you left the tap running for a little too long—all of that water saved with a simple, automatic shut-off system.

Design that Delivers

Touchless faucets bring a sense of futurism and minimalism to kitchen design. They fit seamlessly into the contemporary narrative, complementing sleek countertops and minimalist decor with their clean lines and lack of clunky handles.

The Cons of Touchless Kitchen Faucets

While the allure of touchless kitchen faucets is strong, it’s crucial to address the other side of the coin. Let’s walk through the potential drawbacks, ensuring you have all the information needed to make an informed decision.

The Investment Consideration

Touchless kitchen faucets, allowing operation without physical contact, usually cost more than traditional faucets due to their advanced technology, which offers convenience and hygiene. However, the higher initial cost can be a deterrent for those on a strict renovation budget.

Installation Hurdles

These swanky faucets often require professional installation, which adds to the cost and complication. Sometimes, there might be issues with detection or battery-powered models requiring frequent maintenance.

Technology Is Not Always Foolproof

Nothing is perfect, including innovative technologies. Battery-powered or electric, the sensor technology behind touchless faucets is impressive but not infallible. Issues with sensitivity or power can render them manual faucets until the problem is fixed.

Weighing the Pros and Cons of Touchless Kitchen Faucets

Touchless kitchen faucets represent a harmonious blend of functionality and affordability. By weighing the pros and cons of touchless faucets, you can make the best decision for your kitchen needs. Incorporating touchless faucets into your kitchen presents a host of benefits, such as efficiency, sanitation, and a sleek, contemporary design.

George’s Showroom offers an exemplary choice with the Vola kitchen faucet. This faucet marries the advantages of touchless technology with the dependable performance and elegance synonymous with George’s Showroom. Check out our inventory of luxurious kitchen and bathroom fixtures today!