Everything You Need To Know About Maintaining Your Faucet

A double-bowl stainless-steel kitchen island sink with a black faucet, quartz countertops, and green cabinets.

Are you tired of dealing with leaky faucets or low water pressure? Maintaining your faucet might seem daunting, but it’s essential for ensuring that your plumbing runs smoothly and efficiently.

To help keep your faucet in stellar shape, we’re here to walk you through everything you need to know about maintaining your faucet, from basic cleaning to more advanced troubleshooting. By the end of this post, you’ll have all the knowledge you need to keep your faucet working perfectly for years to come.

The Importance of Faucet Maintenance

Faucets are among the most frequently used fixtures in any home. Over time, they can wear out, leading to leaks, decreased water pressure, and other issues. Regular maintenance helps prevent these problems, saving you money on water bills and potential repairs.

By neglecting maintenance, you put your water pressure at risk. This can manifest from mineral buildup or other obstructions. Regularly cleaning your faucet’s aerator and other parts ensures optimal water flow and performance, keeping everything efficient and preventing costly problems.

Extending Faucet Lifespan

A well-maintained faucet can last for many years. By taking the time to care for your faucet, you’re investing in the longevity and efficiency of your home’s plumbing system. This can also save you time and money in the long run by avoiding expensive repairs or replacements.

Basic Faucet Cleaning

Maintaining your faucet doesn’t have to be a complicated process. Simple regular cleaning and minor adjustments can make a world of difference. Here are a few basic ways to keep your faucet squeaky clean:

Daily Wipe-Down

You can wipe down your faucet with a soft cloth daily. This helps remove water spots, soap residue, and fingerprints that can build up over time. A quick wipe-down can keep your faucet looking shiny and new.

Weekly Deep Clean

Once a week, give your faucet a deeper clean. Use a mild soap and water mixture to remove any grime or buildup. Be sure to pay extra attention to the nooks and crannies where dirt can accumulate.

Mineral Buildup Removal

Mineral buildup from hard water can affect your faucet’s performance. To remove it, soak a cloth in vinegar and wrap it around the affected area for a few hours. The vinegar will help dissolve the minerals, making them easier to scrub away.

A close-up of a male plumber using a hand tool to fix a leaking or faulty sink in a residential bathroom.

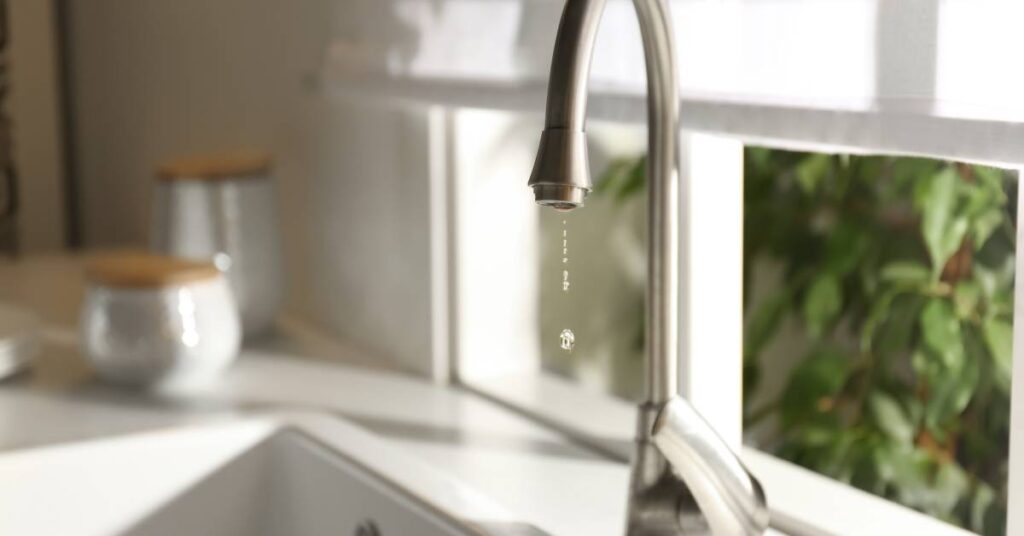
Remember To Check for Leaks

Regularly inspecting your faucet for leaks is crucial. You can start by looking over the base where it connects to the sink. A leak is likely present if you notice any pooling water or dampness. Next, turn on the faucet and observe the handles for drips. If water is escaping, you may need to replace the O-rings or tighten the connections.

Additionally, monitor your water bill for any sudden increases, as this could indicate a hidden leak in your faucet or plumbing. Addressing leaks promptly can save you money and prevent further damage.

Maintain Your Faucet Components

Your faucet consists of several components that require regular maintenance. Here’s what you need to know:

Cleaning the Aerator

The aerator is the small screen at the end of your faucet’s spout. It can become clogged with mineral deposits and debris, affecting water flow. To troubleshoot this, remove the aerator and soak it in vinegar to dissolve any grime. Once soaked off, rinse it thoroughly before reattaching it.

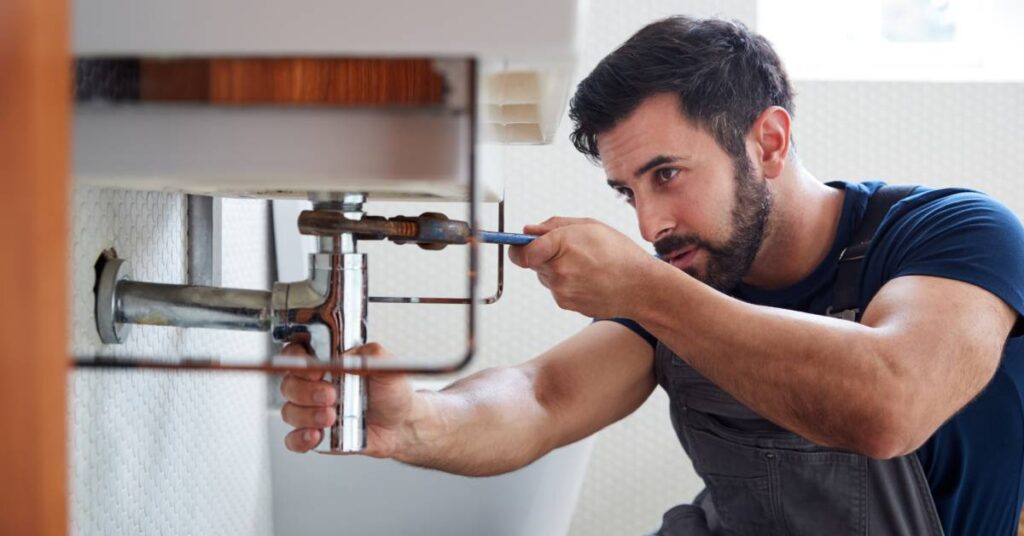
Replacing Washers and O-Rings

Washers and O-rings are small rubber components that can wear out over time. If your faucet is leaking, these parts may need replacements. Consult your faucet’s manual to find the correct sizes and types of washers and O-rings for your model.

Lubricating Moving Parts

Apply a small amount of plumber’s grease to keep your faucet’s handles and other moving parts operating smoothly. This will help reduce friction and prevent wear and tear.

Advanced Troubleshooting for Bigger Issues

If your faucet is still causing issues after basic care, it’s time to bring out the big tools. Advanced troubleshooting may be required if you’re experiencing more severe problems with your faucet. Here’s what to look for:

Addressing Low Water Pressure

Various factors, including clogged pipes or a malfunctioning pressure regulator, can cause low water pressure. If cleaning the aerator doesn’t resolve the issue, you may need to consult a professional plumber.

Fixing Dripping Faucets

A worn-out cartridge or valve seat often causes a dripping faucet. Replacing these components can be a bit more complex, but it’s a task that many homeowners can handle with the right tools and instructions.

Dealing With Noisy Faucets

If your faucet is making strange noises, it could be due to pipe air or a loose component. To resolve the issue, tighten any loose parts and bleed the air from your plumbing system.

A close-up of a dripping kitchen faucet with water drops actively falling. The window next to it is open.

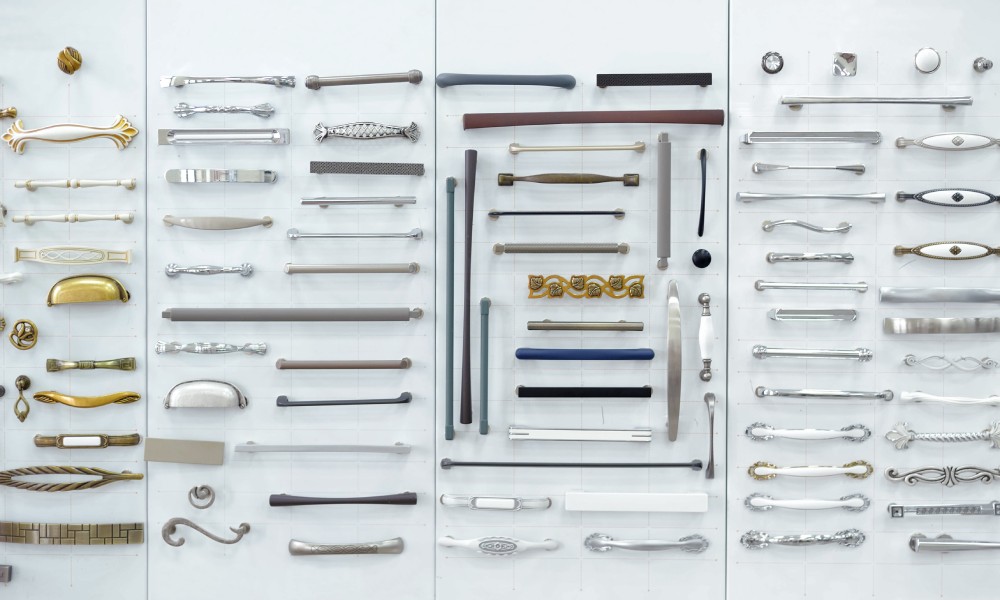
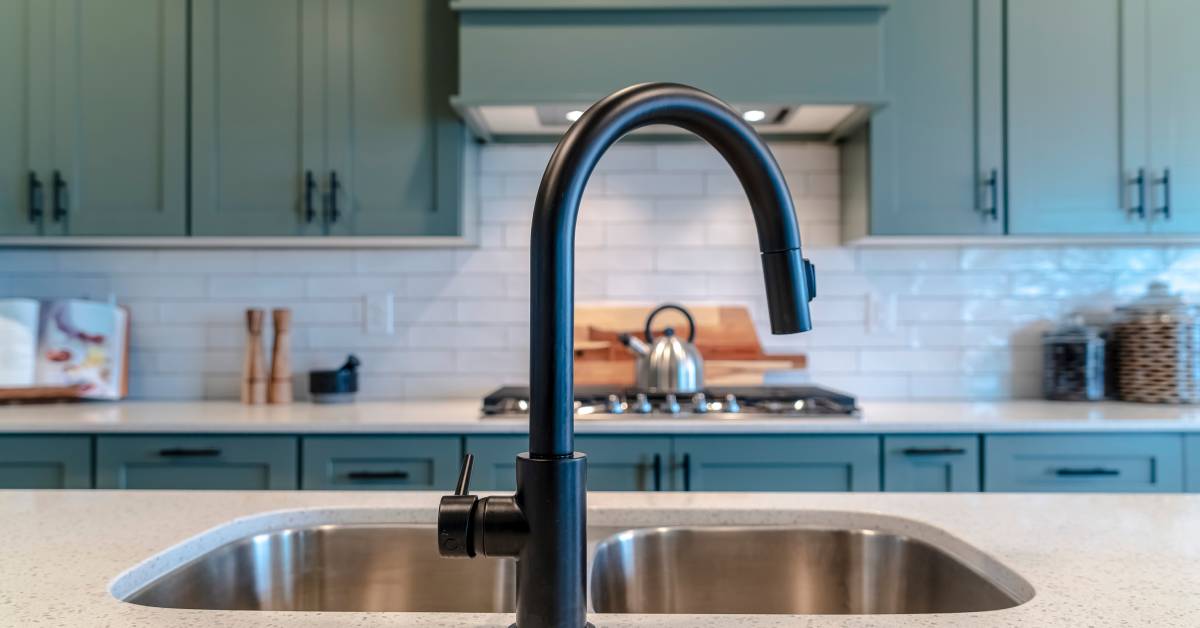
Choosing the Right Faucet

When it’s time to replace your faucet, choosing the right one can significantly impact your home’s plumbing. Faucets come in various styles and finishes, from sleek modern designs to classic options. Select a faucet that matches your home’s look and meets your needs. A high-quality faucet with durable materials, such as brass or stainless steel, will resist corrosion and wear. It’ll last for years.

Check for Features

Modern faucets have various features, such as pull-out sprayers, touchless operation, and water-saving technology. Consider which features are most important to you, and look for a faucet that offers them.

The Key to Long-Term Maintenance

Consistency is the cornerstone of long-term faucet maintenance. Establishing and sticking to a routine ensures your faucet remains in optimal working condition. Regular upkeep prevents minor issues from escalating into significant problems, saving you time and money. Here are some key points to remember for effective long-term maintenance:

• Schedule regular cleanings and inspections.
• Keep an eye out for any changes in water flow or pressure.
• Address minor issues promptly to prevent them from becoming more extensive and costly repairs.
• Don’t hesitate to consult a professional if you’re unsure about maintenance tasks.

Keep Your Faucet in Tip-Top Shape

Maintaining your faucet is essential for optimal performance and longevity. By understanding everything you need to know about maintaining your faucet, you can keep it in top shape and avoid leaks and low water pressure.

Whether you handle maintenance or hire a professional, regular care will maximize your home’s plumbing system. For expert advice and quality products, visit George’s Showroom and explore our California Faucets collection. Here’s to a drip-free, efficient, and long-lasting faucet!

5 Quick Home Improvements That Will Jazz Up Your Home

An Interior designer is choosing paints and textile materials for a home renovation. They're laying out samples on a board.

Do you want to give your home a fresh look without breaking the bank or spending countless hours renovating? Small home improvements can make a big difference in the ambiance and functionality of your living space, making it a more enjoyable place to live. Explore five quick home improvements that will jazz up your home!

Revitalize the Walls With Fresh Paint

A fresh coat of paint is one of the best ways to revitalize a room. Whether you choose a bold accent wall or a neutral tone, paint can transform a space. Pick a palette that complements your furniture and décor. After painting, remember those finishing touches! Finding new wall art or rearranging existing pieces can enhance the look. You’ll be amazed at how a simple paint job can transform your home!

Upgrade the Light Fixtures

Upgrading to modern lighting can enhance your home’s ambiance. Replace old fixtures with contemporary designs for a brighter, more elegant look. LEDs are energy-efficient and long-lasting, and dimmable options offer adjustable brightness for various activities and times of day.

Let in the sunshine! Install sheer curtains or blinds to let in sunlight, creating a warm and inviting atmosphere. Lighting can make your home feel more spacious and welcoming.

Install High-Quality Door Hardware

Upgrading door hardware is a simple way to add style and functionality to your home. High-quality options, like Emtek door hardware, offer designs that look great with any door. When choosing door hardware, consider your home’s design and color scheme.

Go for finishes that match your décor, such as polished chrome, oil-rubbed bronze, or satin nickel. Besides looking good, high-quality door hardware boosts a door’s security and durability. You’ll feel the difference every time you open and close a door!

Refresh the Flooring

Your floors endure daily wear, so refreshing them can enhance your home’s vibe. Whether you choose a new carpet, hardwood, or tile, plenty of options will fit your style and budget. For a quick, budget-friendly update, add area rugs to bring color and texture to your rooms. Rugs can define spaces, especially in open-concept homes, and add a cozy feel underfoot.

Enhance Your Home’s Curb Appeal

Enhancing your home’s curb appeal is a quick home improvement that can help jazz up the exterior. Start by painting the front door a bold color and upgrading its hardware. Maintain landscaping by trimming bushes, adding mulch, and planting flowers.

Other easy improvements include updating your address numbers, installing outdoor lighting, and adding a welcoming doormat. Small changes can significantly improve your home’s exterior.

Spruce up Your Home With Ease

Small home improvements can profoundly impact your living space, making it more enjoyable and functional. Implementing these five simple upgrades will create a more inviting and stylish home. Ready to get started? Consider booking a consultation with a professional to help you choose the best options for your unique needs. Your dream home is just a few improvements away!

How To Organize a Small Bathroom in 10 Easy Steps

How To Organize a Small Bathroom in 10 Easy Steps

A small bathroom often feels cramped and chaotic, and finding space for all your essentials is challenging. However, strategic organization techniques can transform even the tiniest bathroom into a functional and stylish haven.

We’ll cover everything you need to know, from clever storage solutions to smart design tips. Whether utilizing vertical space with shelves, incorporating multipurpose furniture, or choosing the right color palette to create the illusion of a larger space, we can help you make the most of every square inch.

By the end, you’ll have an efficient bathroom that’s a pleasure to use daily. Here are ten easy steps to maximize a small bathroom space and create an organized, serene environment.

Step 1: Declutter

The first step to organizing any space is to declutter. Start by figuring out what you need and what you can get rid of. Ask yourself, “Do I use this item? Is it expired or damaged?” Be honest, and avoid keeping things for sentimental reasons or “just in case.” Eliminating unnecessary stuff will free up valuable space and create a solid foundation for more organization.

Try sorting items into “keep,” “donate,” and “trash” piles. This will make decluttering more structured and manageable. Also, consider how often you use certain items. Things you use less often can go in less accessible places, making frequently used items more straightforward to reach.

Step 2: Assess Storage Needs

Evaluate your storage needs. Consider the items you use daily versus those you use occasionally. This will help you determine the best storage solutions for your bathroom. Think about the types of products, tools, and linens you have and how often you need to access them.

Step 3: Utilize Wall Space

One of the most effective strategies for organizing a small bathroom is utilizing wall space. Install shelves, hooks, or racks to keep items off the floor and within easy reach. Floating shelves are handy for storing toiletries and decorative items, while wall-mounted baskets can hold towels and other accessories. For additional space, you can add multifunctional furniture, such as a vanity with built-in storage or a mirror cabinet.

Step 4: Organize Drawers and Cabinets

Drawers and cabinets are prime real estate in any bathroom, so using them efficiently is essential. Invest in drawer dividers and organizers to hold small items like makeup, hair accessories, and grooming tools. For cabinets, consider adding stackable bins or pull-out trays to maximize vertical space and make items more accessible.

Examples:

  • Drawer dividers
  • Organizers for small items
  • Stackable bins
  • Pull-out trays

Step 5: Use Under-Sink Organization

The area under the sink often goes overlooked but can provide valuable storage space. Use stackable bins, pull-out drawers, or tiered shelves to organize cleaning supplies, extra toiletries, and other essentials. Consider installing a Vola bathroom faucet, which adds a touch of elegance and frees up additional space under the sink with its sleek design.

Step 6: Organize the Linen Closet

If you have a linen closet in your bathroom, keeping it organized is crucial. Use labeled baskets or bins to separate towels, washcloths, and other linens. Roll towels instead of folding them to save space and create a spa-like aesthetic. A shelf divider can also help keep items stacked neatly.

Step 7: Use Shower Storage

Organizing your shower is paramount in maintaining a clutter-free bathroom. Given the limited space, smart storage solutions must keep your shower essentials within easy reach while maintaining a tidy appearance. Here are some effective strategies to achieve optimal shower organization:

  • Install corner shelves or a shower caddy to store shampoos, conditioners, and body washes.
  • Use suction cup hooks to hang loofahs and washcloths.
  • Add a hanging shower organizer to hold razors and other small items.
  • Add a tension rod for hanging baskets or additional hooks.
  • Use magnetic strips to secure metal grooming tools.
  • Get a waterproof clock to keep track of time.
  • Install a shower mirror for shaving or facial-care routines.

Step 8: Use Over-the-Door Storage

Don’t overlook the back of the bathroom door as a storage opportunity. Over-the-door organizers can hold everything from toiletries to cleaning supplies. Look for options with clear pockets to see and access your items easily. This is an excellent way to keep frequently used products within reach without wasting valuable floor space.

Step 9: Maximize Light and Use Mirrors

A well-lit bathroom feels more spacious and inviting. Maximize natural light by keeping windows clear of obstructions and using sheer curtains. If natural light is limited, install bright, energy-efficient lighting. Mirrors can also create the illusion of space. Consider a large mirror above the sink or multiple smaller mirrors to reflect light and open up the room visually.

Step 10: Do Maintenance and Ongoing Organization

Once you’ve organized your bathroom, regular upkeep is the key to keeping it that way. Establish a routine where you tidy up daily by wiping surfaces, putting away toiletries, and ensuring everything is in place. Every month, dedicate some time to deeper cleaning, including scrubbing tiles, cleaning grout, and removing expired products. Put things away right after you use them to avoid clutter and keep the space functional and serene. This consistent attention will ensure your bathroom remains a relaxing and orderly sanctuary.

Keeping your bathroom organized doesn’t have to be a chore. Here are some simple tips to keep your space tidy and functional:

  1. Create a daily routine: Wipe surfaces, put away toiletries, and hang towels daily. This will help prevent clutter and maintain organization.
  2. Use labels: Label baskets, bins, and shelves so that everyone knows where things belong. This makes it easier to keep everything in its place.
  3. Assign spots for frequently used items: Ensure frequently used items like toothbrushes and hand towels are easy to access. Designate specific spots for these items to streamline your routine.
  4. Stay flexible: Be open to adjusting your organizational system. As your lifestyle changes, so may your storage needs. Flexibility is critical to maintaining an organized bathroom long term.

Create a Spa-Like Experience Today

With our ten-step guide to organizing a small bathroom, you can transform your space into an efficient, functional, and beautiful sanctuary. By implementing these strategies, you’ll enhance your bathroom’s efficiency and elevate your daily routine. Ready to embark on your bathroom organization journey? Visit George’s Kitchen and Bath to explore our range of quality products and innovative solutions tailored to your needs.

How To Organize a Small Bathroom in 10 Easy Steps

Practical Organization Tips for Your Bathroom Cabinets

A well-organized and modern residential blue bathroom with a double vanity cabinet and blue and white tiled floors.

A well-organized bathroom can transform your daily routine, making your mornings stress free and your evenings more relaxing. Imagine starting your day with everything you need at your fingertips, from neatly arranged toiletries to easily accessible towels. If your bathroom cabinets are cluttered and chaotic, it’s time to take control. This simple change can bring a sense of order and calm to your space, enhancing your overall well-being.

Here are a few practical organization tips for your bathroom cabinets to help maximize space and efficiency.

Assessing Your Needs

Before you begin organizing your bathroom cabinets, you must understand what you need to store there. Are you dealing with an overabundance of toiletries, towels, or cleaning supplies? Evaluate your storage space and determine which items are essential for your bathroom. Ask yourself: “What do I use daily, and what can I store elsewhere?” From there, you can assess your needs and dictate your storage flow.

Decluttering Strategies

Decluttering is the cornerstone of any successful organizational project. Start by emptying your cabinets and sorting through every item. Create three piles for keeping, discarding, and relocating. Be ruthless with the discard pile—expired products and items you haven’t used in months have no place in your newly organized space.

Also, group similar items together to make organizing easier. This way, you can quickly locate your hair-care products, skin-care essentials, and first-aid supplies when needed.

Storage Solutions

Now that you’ve decluttered, it’s time to think about how to store your remaining items effectively. Invest in creative storage solutions that make the most of your space:

Drawer dividers: These are perfect for keeping small items like makeup and grooming tools separate and easily accessible.
Baskets and bins: Use these to organize more oversized items, such as bath towels or cleaning supplies.
Over-the-door organizers: Maximize vertical space by hanging these inside cabinet doors for extra storage.

Consider upgrading to James Martin vanities, known for their stylish design and functional storage options. These vanities offer ample space for all your bathroom necessities, making it easier to maintain an organized environment.

Maintenance and Upkeep

The key to long-term organization is regular maintenance. Set aside time each month to review the contents of your bathroom cabinets. Remove items that are no longer necessary, and ensure you return everything to its designated place. Consistent upkeep will prevent clutter from creeping back in and keep your space tidy and efficient.

Implementing these practical bathroom cabinet organization tips will help you achieve a streamlined, stress-free space that adds tranquility to your daily routine. Enjoy the convenience of being able to find your items quickly and efficiently. Browse our luxurious vanities and bathroom fixtures to help spruce up your space.

When To Use Knobs vs. Pulls on Your Cabinet

A wide variety of decorative and stainless steel cabinetry door knobs and pull handles are on display.

Have you ever noticed how small details can dramatically change the look and feel of a room? Cabinet hardware, such as knobs and pulls, are perfect examples of these subtle touches that make a significant impact.

Whether you’re a homeowner embarking on a renovation or an interior designer crafting a masterpiece, understanding when to use knobs versus pulls on your cabinet can elevate your design to the next level. Keep reading to enhance your interior design.

The Difference Between Knobs and Pulls

What sets knobs and pulls apart? Knobs are typically small, round pieces of hardware affixed to the cabinet with a single screw. They are simple, classic, and versatile. Pulls, on the other hand, are elongated and require two screws for attachment, offering a more substantial grip.

Functionally, knobs are generally used for cabinets, while pulls are more commonly reserved for drawers. Their practical uses vary depending on the ease of access and the force needed to open the cabinet or drawer.

Aesthetics and Design

The choice between knobs and pulls significantly affects the overall aesthetics of your space. Knobs often lend a timeless, charming look to cabinets, making them perfect for traditional or cottage-style kitchens. With their sleek lines, pulls are ideal for modern, contemporary designs.

Matching your hardware to the style of your cabinets and home is crucial. For example, if your home features rustic wooden cabinets, vintage-style knobs might be the way to go. On the other hand, streamlined pulls can create a cohesive and sophisticated appearance if you have sleek, high-gloss cabinets.

Ergonomics and Daily Use

Beyond aesthetics, consider the ergonomics and daily usability of knobs and pulls. Pulls offer a more comfortable grip, making them easier to use, especially for larger drawers or cabinets that store heavy items. Knobs, while charming, might not provide the same level of comfort for frequent use.

Best practices for placement include installing knobs on cabinet doors and pulls on drawers to ensure ease of use. The hardware size should also correspond to the size of the cabinet or drawer to maintain balance and functionality.

When To Use Knobs vs. Pulls

When choosing between knobs and pulls, think about the overall design and functionality of your space. There’s no hard and fast rule for using one over the other; the choice comes down to personal preference and the look you want. Here are a few things to consider:

  • Cabinet type and size: Smaller cabinets might look disproportionate with large pulls, making knobs a better choice.
  • Room style and function: A modern kitchen might benefit more from sleek pulls, while a traditional bathroom could be improved by classic knobs.
  • Personal preferences and design trends: Your taste and current trends can also guide your decision. For instance, mixing knobs and pulls is a growing trend that adds visual interest and functionality.

Adorn Your Cabinets With the Finest

Choosing between knobs and pulls may seem like a minor detail, but it dramatically impacts your home’s overall design and functionality. Understanding the many considerations associated with this design choice allows you to make a well-informed decision that elevates your space.

Ready to transform your cabinets? Explore our exquisite range of finishes, such as Emtek door knobs, and discover how small details can make a big difference in your home design.

4 Helpful Things You Can Do for Your Kitchen Drains

A stream of water falling and pooling into a stainless steel kitchen sink and entering a draining system.

Keeping your kitchen drains pristine is crucial for maintaining a clean and functional kitchen. Often overlooked, drain maintenance can prevent clogs, eliminate unpleasant odors, and save you from costly repairs. By following a few simple yet effective tips, you can keep your drains clear. Here are four helpful things you can do to keep your kitchen drains in top shape.

1. Establish a Regular Cleaning Routine

How often do you clean your kitchen drains? Regular maintenance is the key to preventing blockages and buildup. Aim to clean your drains at least once a week. Use hot water and vinegar to flush out residue and keep your drains smelling fresh. Make it a habit, and your drains will thank you!

2. Avoid Grease Buildup

Are you guilty of pouring cooking oils and fats down the drain? This common mistake leads to stubborn clogs over time. Instead, let the grease cool and solidify, then dispose of it in the trash. Making this small change can reduce the risk of clogs and keep your kitchen drains flowing smoothly.

3. Prevent Clogs With Everyday Items

Simple daily habits can make a big difference in preventing drain clogs. You can use a sink strainer to catch food and debris before they enter the drain. This inexpensive tool is highly effective in avoiding buildup. An ounce of prevention is worth a pound of cure!

4. Hire a Professional for Maintenance

When should you call in the experts? If you notice persistent clogs, slow drains, or unpleasant odors that regular cleaning can’t fix, it’s time to seek professional help. A licensed plumber can perform thorough inspections and offer advanced solutions to keep your kitchen drains in optimal condition.

Keep Your Drain in Good Condition

By incorporating these tips to help your kitchen drains, you can extend their life. When it’s time for a professional touch, remember that George’s Kitchen and Bath is here to assist. Our California Faucets kitchen faucet collection will add elegance to your kitchen and ensure lasting performance and reliability. Don’t wait for a problem to make itself known! Take proactive steps today, and enjoy a hassle-free kitchen tomorrow.